The first time I opened an electrical panel on my own — not as an apprentice standing beside my mentor, but solo, on a job, with a homeowner watching — my hands were steadier than I expected. That steadiness didn’t come from bravado. It came from understanding exactly what I was looking at. That’s the whole point of this home electrical basics guide. If you understand your system, you respect it correctly. You don’t fear it blindly, and you don’t dismiss it recklessly. Both extremes get people hurt.
I’ve been a licensed electrician for 12 years. In that time, I’ve worked on everything from 1940s knob-and-tube rewires to brand-new smart home installations with 400-amp service. I’ve pulled permits in four states, failed inspections (twice — I’ll tell you why later), and watched plenty of well-meaning homeowners create genuinely dangerous situations because they lacked basic knowledge. This guide exists to close that gap.
This is the most comprehensive resource I’ve put together on this site. Bookmark it. Share it with anyone who owns a home. By the end, you’ll understand how your panel works, what your wires mean, which tasks you can safely DIY, and — just as importantly — when to put the screwdriver down and call a pro.
How Your Electrical Panel Actually Works
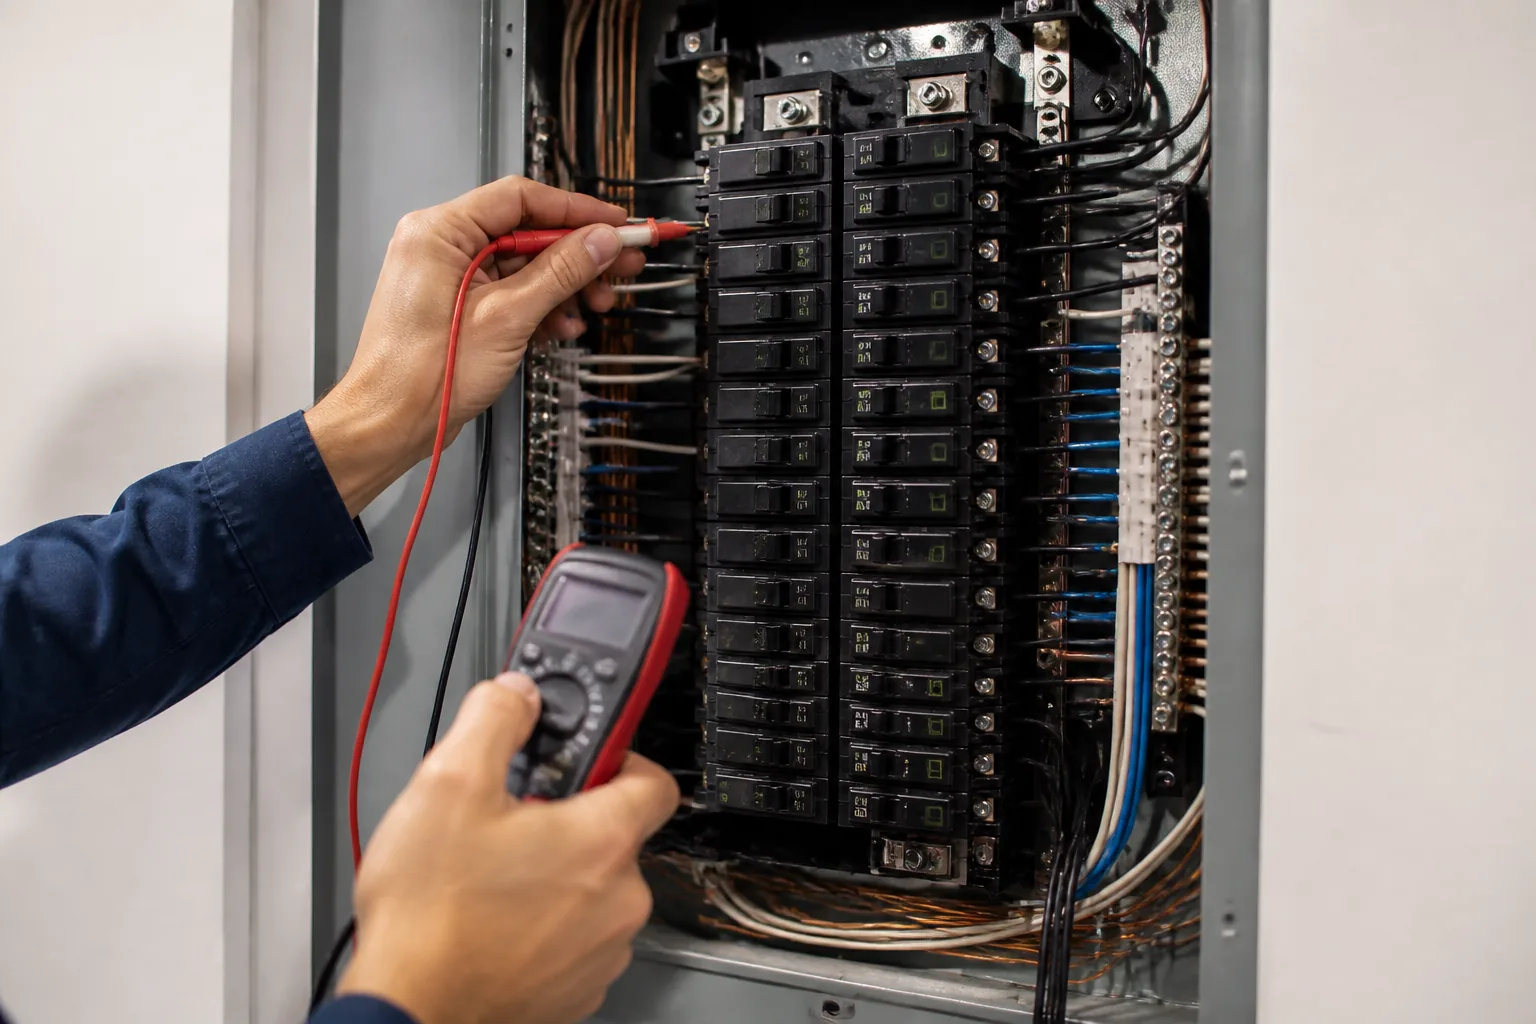
Your electrical panel — also called a breaker box, load center, or service panel — is the heart of your home’s electrical system. Power arrives from the utility company through two hot service wires, each carrying 120 volts. Together, they deliver 240 volts of service to your home. Those wires connect to the main breaker, which is typically rated at 100, 150, or 200 amps in most modern homes.
From the main breaker, power feeds a pair of bus bars running down the center of the panel. Individual circuit breakers clip onto those bus bars. Each breaker controls one circuit in your home. When a circuit draws more current than the breaker is rated for, the breaker trips — that’s the protection mechanism doing its job. A tripping breaker is a symptom, not the problem itself.
In my experience, most homeowners have never actually looked inside their panel. I get it — it looks intimidating. However, understanding what’s in there is genuinely empowering. A standard 200-amp panel like a Square D QO or Eaton BR series has room for 30 to 40 breaker slots. Older 100-amp panels may have only 20 slots. If your home was built before 1990, there’s a real chance you’re running out of capacity — especially with EV chargers and heat pumps becoming common.
Breaker Ratings: What the Numbers Mean
Every breaker has an amperage rating stamped on its handle: 15, 20, 30, 40, 50, or 60 amps are the most common in residential work. That rating tells you the maximum sustained current the circuit can carry. A 15-amp breaker protects a 15-amp circuit. A 20-amp breaker protects a 20-amp circuit. Sounds obvious, but here’s where people go wrong — they assume a bigger breaker means more protection. It’s the opposite. The breaker protects the wire, not the appliance.
The panel also contains a neutral bus bar and a ground bus bar. In the main panel, these are typically bonded together. In a subpanel — a secondary panel fed from the main — they must be kept separate. Getting that wrong is one of the most common DIY mistakes I see, and it creates shock hazards.
Wire Gauges and What They’re Rated For
Wire gauge is measured by the American Wire Gauge (AWG) system. Here’s the counterintuitive part: a lower number means a thicker wire. Twelve-gauge wire is thicker than 14-gauge. Thicker wire carries more current safely. This trips up beginners constantly, and I’ve seen it cause real problems on job sites.
For standard residential circuits, these are the pairings you need to know cold:
- 14 AWG wire — 15-amp breaker — Used for general lighting and basic outlet circuits
- 12 AWG wire — 20-amp breaker — Required for kitchen countertop and bathroom circuits
- 10 AWG wire — 30-amp breaker — Clothes dryers, some water heaters, EV Level 1 chargers
- 8 AWG wire — 40-amp breaker — Electric ranges and some HVAC equipment
- 6 AWG wire — 50-amp breaker — Large electric ranges, hot tubs, Level 2 EV chargers
Never upsize a breaker without also upsizing the wire. I cannot stress this enough. The failure I mentioned earlier — one of my two failed inspections — happened because a previous contractor had put a 20-amp breaker on 14-gauge wire. The inspector caught it. If he hadn’t, that wire was a future house fire waiting to happen.
Reading Wire Colors in Romex Cable
Most residential wiring uses NM-B cable, commonly called Romex (a brand name that became generic). The outer jacket color tells you the gauge at a glance. Yellow jacket is 12 AWG. White jacket is 14 AWG. Orange jacket is 10 AWG. Gray is typically used for underground or wet locations. Inside every cable, you’ll find a black hot wire, a white neutral wire, and a bare copper ground wire.
On 240-volt circuits, you’ll see two hot wires — typically black and red — along with white neutral and bare ground. Some older homes use aluminum wiring, which requires special connectors and devices rated for aluminum. If your home was built between 1965 and 1973, have a licensed electrician evaluate your aluminum wiring. This is not optional advice. [INTERNAL LINK: aluminum wiring safety]
Understanding Circuit Types: General, Dedicated, and More
Not all circuits are created equal. Your home has several types, each serving a specific purpose defined by the National Electrical Code (NEC).
General purpose circuits serve groups of outlets and lights throughout the living spaces. These are typically 15-amp circuits on 14-gauge wire. A single circuit might cover several bedrooms or a hallway — loads are expected to be light and varied.
Small appliance circuits are 20-amp, 12-gauge circuits required in kitchens, dining rooms, and pantries. The NEC (Article 210.11) requires a minimum of two of these circuits for kitchen countertop receptacles. They exist because small appliances — toasters, coffee makers, air fryers — can pull 1,200 to 1,800 watts each.
Dedicated circuits serve a single appliance or piece of equipment only. Your refrigerator, dishwasher, microwave, washing machine, and HVAC system should each be on their own dedicated circuit. Adding a major appliance to a shared circuit is a frequent cause of tripped breakers and damaged equipment.
240-Volt Circuits: How Double-Pole Breakers Work
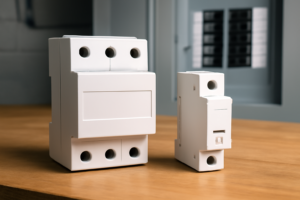
When you look at your panel, you’ll notice some breakers take up two slots instead of one. These are double-pole breakers, and they supply 240 volts by connecting to both hot bus bars simultaneously. They’re used for dryers, ranges, electric water heaters, central air conditioners, and EV chargers.
A 30-amp double-pole breaker, for example, provides 30 amps at 240 volts — that’s 7,200 watts of capacity. That’s why your dryer can heat and tumble simultaneously without tripping. Understanding this also explains why you can’t just add a 240-volt outlet wherever you want — it requires a new circuit run from the panel. [INTERNAL LINK: how to add a dedicated circuit]
GFCI and AFCI Protection: The Life-Saving Devices in Your Home
Two types of protective devices have prevented more deaths and fires than almost any other electrical advancement in the last 50 years. Every homeowner needs to understand both.
GFCI: Ground Fault Circuit Interrupters
A GFCI monitors the current flowing out on the hot wire versus returning on the neutral wire. If there’s a difference of just 5 milliamps — meaning some current is finding an unintended path, possibly through a human body — it trips in about 1/40th of a second. That’s fast enough to prevent electrocution in most scenarios.
The NEC requires GFCI protection in bathrooms, kitchens (within 6 feet of a sink), garages, outdoors, unfinished basements, crawl spaces, and near swimming pools. If your home was built before 1975, there’s a reasonable chance some of these locations aren’t protected. That’s a code violation and a genuine safety hazard — even if the inspector who signed off on it originally isn’t around to say so.
You can protect a circuit with either a GFCI outlet (the one with TEST and RESET buttons) or a GFCI breaker in the panel. One GFCI outlet can protect all downstream outlets on the same circuit if wired correctly through the LOAD terminals. This is one of the most cost-effective safety upgrades a homeowner can make themselves.
AFCI: Arc Fault Circuit Interrupters
AFCI breakers detect a different type of dangerous condition: arc faults. An arc fault happens when electricity jumps across a gap in damaged or loose wiring — think a stapled wire with a nick in the insulation, or a loose connection in a junction box. This arcing generates intense heat and is a leading cause of house fires. A standard breaker won’t trip from an arc fault because the current draw isn’t necessarily high enough.
Since the 2014 NEC cycle, AFCI protection has been required for nearly all living areas in new construction — bedrooms, living rooms, dining rooms, hallways, and more. Combination AFCI/GFCI breakers now cover both hazards in one device. They cost around $40–$60 each, which is real money when you’re protecting 20+ circuits. However, in my experience, it’s money extremely well spent.
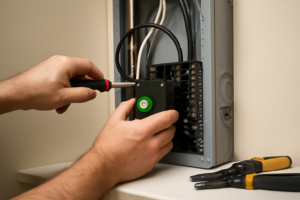
Safe DIY Electrical Tasks for Homeowners
Let me be direct: most states allow homeowners to do their own electrical work on their primary residence. That doesn’t mean all electrical work is DIY-appropriate. Skill, knowledge, and the right tools matter enormously. Here’s a honest breakdown of what’s typically within reach for a careful, informed homeowner.
Tasks Most Homeowners Can Handle
- Replacing outlets and switches — One of the most beginner-friendly tasks. Turn off the breaker, verify it’s off with a non-contact voltage tester, and swap the device. Always photograph the existing wiring before disconnecting anything.
- Installing GFCI outlets — Same process as above, with the added step of correctly identifying LINE vs. LOAD terminals.
- Replacing a light fixture — Straightforward if the box is rated for the fixture weight. Ceiling fans require a fan-rated box — a standard light box is not acceptable.
- Adding a smart switch or smart outlet — Requires a neutral wire in the box, which older homes sometimes lack. Check before purchasing.
- Resetting a tripped breaker and identifying why it tripped — Essential troubleshooting knowledge for any homeowner.
Tasks That Usually Require a Licensed Electrician
- Panel upgrades or replacements
- Adding new circuits from the panel
- Any work on the service entrance or meter base
- Whole-home rewiring
- Generator interlock or transfer switch installation
- Work inside the panel with the main breaker on (the service wires from the utility are always live — even with the main breaker off)
Specifically: never work inside your panel without understanding which parts remain energized even after you shut off the main breaker. The two large wires coming into the top of the panel — the service entrance conductors — are always live unless the utility disconnects power at the meter. Only the utility can make those safe. This is a non-negotiable point.
Electrical Safety Rules That Aren’t Negotiable
I’ve built these into muscle memory over 12 years. Treat them as absolutes, not suggestions.
- Test before you touch — always. Turn off the breaker, then use a non-contact voltage tester to verify the circuit is dead. Breakers mislabel. Circuits share odd paths in older homes. A $15 tester has saved me from serious injury more than once.
- Never work on live circuits. I know some professionals do. I don’t on DIY-scope work, and I’d strongly advise you don’t either. The margin for error is too thin.
- Lock out the breaker. If someone else is home, use a breaker lockout clip — they cost about $3 and prevent someone from accidentally re-energizing your circuit while your hands are in the box.
- Don’t work alone in difficult conditions. Working in a cramped attic in August heat, or a wet crawl space, compromises judgment and physical stability. Both matter when electricity is involved.
- Pull a permit when required. I know this is the advice people skip. Permits exist to ensure inspections happen. Inspections catch mistakes. Unpermitted work can also void homeowner’s insurance and cause serious problems when selling.
- Use the right tools. Insulated screwdrivers, a quality non-contact voltage tester, wire strippers, and needle-nose pliers are the basics. Don’t improvise with uninsulated tools.
Common Home Electrical Basics Guide Mistakes — And How to Avoid Them
Mistake 1: Assuming a Tripped Breaker Just Needs Resetting
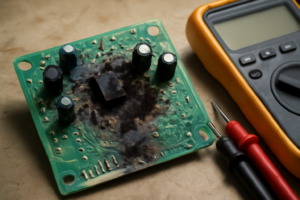
A tripping breaker is telling you something. Resetting it once and moving on is usually fine. Resetting it repeatedly without finding the cause is dangerous. Overloaded circuits generate heat. Sustained heat degrades wire insulation over time. If a breaker trips more than once in a short period, unplug devices and find the cause before resetting again. Persistent tripping without an obvious overload cause may indicate a faulty breaker, a loose connection, or worse — call an electrician.
Mistake 2: Using Extension Cords as Permanent Wiring
Extension cords are for temporary use only. Running one behind furniture to a lamp that’s been there for three years is a code violation and a fire hazard. Cords overheat when coiled, when run under rugs, or when they’re undersized for the load. The solution is to add an outlet where you need one — not to daisy-chain power strips and cords. [INTERNAL LINK: how to add an electrical outlet]
Mistake 3: Reversing Hot and Neutral (Reverse Polarity)
Black wire goes to the brass (darker) screw. White wire goes to the silver (lighter) screw. Get this backward and you have reverse polarity — the outlet will still power your devices, but the switch interrupts the neutral instead of the hot. As a result, the device chassis may be energized even when switched off. This creates shock hazards that are invisible to casual inspection. An inexpensive outlet tester will catch reverse polarity in seconds.
Mistake 4: Overfilling Electrical Boxes
Every wire, device, and connector in an electrical box takes up space — and the NEC defines exactly how much space is allowed. This is called box fill calculation (NEC Article 314.16). Cramming too many wires into a box traps heat and damages insulation. A standard single-gang plastic box holds about 18–20 cubic inches. Each 12-gauge wire counts as 2.25 cubic inches. Each 14-gauge wire counts as 2.0 cubic inches. The device itself counts as a double allowance. Run the math before closing up the box.
Mistake 5: Skipping the Ground Wire
I’ve seen people cap off the bare copper ground wire because “it doesn’t do anything.” It doesn’t do anything — until it does everything. Ground wires provide a low-resistance path for fault current to return to the panel and trip the breaker. Without a ground, a fault can energize the metal chassis of an appliance. That’s the scenario where someone gets electrocuted touching a washing machine. Connect the ground. Every time. No exceptions.
Final Thoughts: Confidence Comes From Understanding
This home electrical basics guide isn’t meant to turn you into an electrician. That takes years of apprenticeship, thousands of hours in the field, and a licensing exam — for good reason. What it’s meant to do is give you enough knowledge to work safely within your abilities, recognize problems before they become emergencies, and have informed conversations with professionals when you need to hire one.
Here’s what I want you to take away: electricity is predictable. It follows rules — physics, code, and installation standards that have been refined over more than a century. Learn those rules and the system makes sense. Ignore them and the system punishes you eventually.
After 12 years, I still double-check my voltage tester before every job. Not because I doubt myself — but because the one time I didn’t check would be the one time it mattered. That’s the mindset that keeps electricians and careful homeowners safe for decades. Develop it early, and it becomes automatic.
Browse the rest of Panels & Plugs for deeper dives into specific topics — adding circuits, upgrading panels, smart home wiring, and more. Each piece builds on the foundation you’ve just laid here. You’re already ahead of most homeowners just by reading this far.